Slack is not only the fastest growing startup in history, but it’s also an app by the same name and one of the most popular communication tools in use today. We use it extensively at MongoDB to foster efficient communications between teams and across the company. We’re not alone. It seems like every developer I encounter uses it in their company as well.
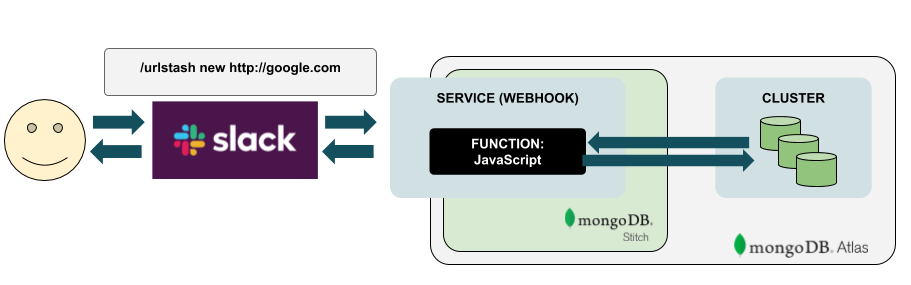
One interesting thing about Slack (and there are many) is its extensibility. There are several ways you can extend Slack. Building chatbots, applications that interface with the communication service and extending Slack through the introduction of additional commands called “slash commands” that enable Slack users to communicate with external services. In this article, we’ll build a simple slash command that enables users to store and retrieve data in and from a MongoDB database. I’m always finding interesting information on the internet that I want to share with my team members so let’s build an application we’ll call URL Stash that will store interesting URLs for later retrieval via a Slack slash command. Now, follow along in the video below or skip over the video and read on for the details.
https://www.youtube.com/embed/FLSvZ2WmYzc
Create a Slack App
Start by logging into your slack team, or you can create a new one for testing. Visit the Slack API Console to create a new Slack App.

You’ll need to have a Slack team or instance where we can install and test URL Stash. I’m going to use the MongoDB Community Slack instance. Once we’ve created the app in our team workspace, we can put the Slack app to the side for the moment and create the other half of the app — the MongoDB Atlas Cluster, Database, Collections, and Stitch app.
Create an Atlas Cluster, Database, and Collection
Stashing URLs implies that we’ll need a place to store them. For this example, we’re going to demonstrate how easy it is to use MongoDB Atlas to do this. We’ll start by logging in to MongoDB Atlas, creating a cluster, a database and a collection. You can start for free and create an M0 class cluster instance. Once you’ve launched your cluster, create a database, and a collection using the collection viewer in Atlas. I called mine exampledb and examplecoll but you may call yours whatever you like. You’ll just need to make sure you reference them correctly in the function we’ll create in Stitch in the next section.

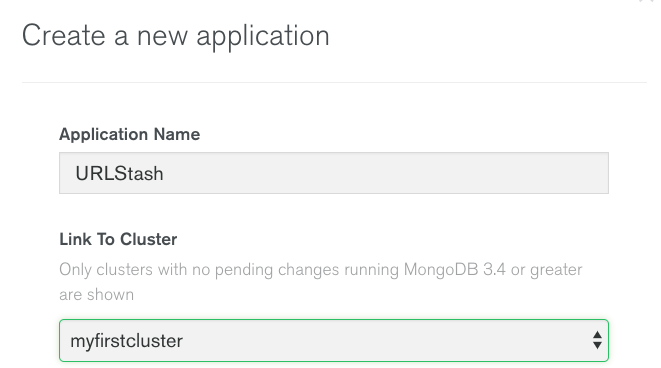
Create a Stitch App
Stitch apps are associated with specific clusters so once you create your cluster, you can click Stitch apps from the left-hand navigation menu in Atlas, then click Create New app.
Create a Service
Services in Stitch are a primary point of integration with the outside world — in this case, Slack. Let’s create an HTTP Service that will provide the integration point between Slack and Stitch.
Click on Services, Add New Service, Click HTTP, and name the service. Click Add Service. Then, in the settings tab, name the incoming webhook something meaningful. I chose “slack” but you may name this anything you like. The webhook will provide an external web address that will be plugged into your Slack app.
Plugging in this webhook URI, will tell your Slack app to send certain details of the conversation from Slack to your newly created Stitch Application.
Once you click Save, your newly created webhook will be assigned a public URI, and you’ll be given the ability to edit the JavaScript code that will be executed when a request is sent to your webhook. You may want to copy the Webhook URL because you will need that shortly when we create a Slack slash command.

This is where the magic happens. In just a few minutes, we created an integration between Slack and Stitch. The simple act of setting some configuration (naming) for your service is all that’s required. Let’s turn our attention to the code that we’ll use to store, and retrieve URLs for our Slack users.
The heart of a Stitch Service is the function that’s run when it receives an incoming request via its Webhook URL. In this case, we chose to respond to POST requests. In Slack, we’ll send the data from a slash command via POST to our Stitch function. We’ll evaluate the text that the user sends as part of the slash command and either stash a URL, or list out the existing URLs that have been previously stashed.
Since the function is receiving the details from Slack, we’ll enable a simple set of commands after the slash command itself. We’ll want users to be able to store URL’s, so we’ll use the command format:
/url stash [url]
And since we’ll want users to be able to review the URL’s that have previously been stashed, we’ll enable a “list” option:
/url list
And lastly, since we’ll want users to be able to remove URLs that they’ve previously added, we’ll enable a “remove” option:
/url remove [url]
With these basic commands in mind, let’s write some basic JavaScript for the function inside our service:
exports = async function (payload) {
   const mongodb = context.services.get("mongodb-atlas");
   const exampledb = mongodb.db("exampledb");
   const examplecoll = exampledb.collection("examplecoll");

   const args = payload.query.text.split(" ");

   switch (args[0]) {
       case "stash":
           const result = await examplecoll.insertOne({
               user_id: payload.query.user_id,
               when: Date.now(),
               url: args[1]
           });
           if (result) {
               return {
                   text: `Stashed ${args[1]}`
               };
           }
           return {
               text: `Error stashing`
           };
       case "list":
           const findresult = await examplecoll.find({}).toArray();
           const strres = findresult.map(x => `<${x.url}|${x.url}>  by <@${x.user_id}> at ${new Date(x.when).toLocaleString()}`).join("n");
           return {
               text: `Stash as of ${new Date().toLocaleString()}n${strres}`
           };
       case "remove":
           const delresult = await examplecoll.deleteOne({
               user_id: {
                   $eq: payload.query.user_id
               },
               url: {
                   $eq: args[1]
               }
           });
           return {
               text: `Deleted ${delresult.deletedCount} stashed items`
           };
       default:
           return {
               text: "Unrecognized"
           };
   }
}
Example Function for Slack HTTP Service in Stitch
The heart of our function is the switch statement which evaluates the text sent to the command by the Slack user.
Create a Slash Command
Let’s complete the final step in the process and add a slash command to our Slack App. To do this, head back over to the Slack app console and click “Slash Command”.

Creating a slash command in Slack
Name your slash command. Keep in mind you’ll need to grab the MongoDB Stitch service webhook URI that we created in the previous section above. Once you save this slash command you should select Install Your app from the left-hand navigation in Slack’s app Management console.

Install App
This will prompt you to confirm your identity on your slack team and authorize the app to be used in your workspace.

Authorize app Installation
Once this is complete, your app is nearly done. You can switch back to your Slack client, visit your own personal chat channel for privacy while you test and type your newly created Slack slash command. For example “/url stash http://mongodb.com”. Pressing enter will send the command to Slack and then to your newly created Stitch app. You should see something like following in response:

It’s just that simple, you’ve created a fully functioning Slack Chatbot, or at least a slash command with only a few lines of code and no servers involved!
This is merely a starting point and you should now easily be able to build additional functionality into your new Slack App. To review more details and fork the project, head over to the GitHub Repository.
Source: Scotch.io