If you don’t already know of it, Todd Motto has this great list of public APIs. It’s awesome if you’re trying out a new framework or new layout pattern and want to hit the ground running without fussing with the content.
But what if you want or need to make your own API? Serverless can help create a nice one for data you’d like to expose for use.
Serverless really shines for this use case, and hopefully this post makes it clear why. In a non-serverless paradigm, we have to pick something like express, we have to set up endpoints, we have to give your web server secured access to your database server, you have to deploy it, etc. In contrast, here we’ll be able to create an API in a few button clicks, with minor modifications.
Here’s the inspiration for this tutorial: I’ve been building a finder to search for new cocktails and grab random one. I originally started using ae public API but realized quickly that I found the contents limiting and wanted to shape my own.
I’m going to use Azure for these examples but it is possible to accomplish what we’re doing here with other cloud providers as well.
Make the Function
To get started, if you haven’t already, create a free Azure trial account. Then go to the portal: preview.portal.azure.com.
Next, we’ll hit the plus sign at the top left and select Serverless Function App from the list. We can then fill in the new name of our function and some options. It will pick up our resource group, subscription, and create a storage account from defaults. It will also use the location data from the resource group. So, happily, it’s pretty easy to populate the data.
Next, we’ll create a new function using HTTP Trigger, and go to the Integrate tab to perform some actions:
What we did was:
- Give the route template a name
- Change the authorization level to “Anonymous”
- Change the allowed HTTP methods to “Selected Method”
- Select “GET” for the selected method and unchecked everything else
Now, if we get the function URL from the top right of our function, we’ll get this:
https://sdras-api-demo.azurewebsites.net/api/helloThe initial boilerplate testing code that we’re given is:
module.exports = function (context, req) {
  context.log('JavaScript HTTP trigger function processed a request.');

  if (req.query.name || (req.body && req.body.name)) {
    context.res = {
      // status: 200, /* Defaults to 200 */
      body: "Hello " + (req.query.name || req.body.name)
    };
  }
  else {
    context.res = {
      status: 400,
       body: "Please pass a name on the query string or in the request body"
    };
  }
  context.done();
};
Now if we go to the URL below, we’ll see this:
https://sdras-api-demo.azurewebsites.net/api/hello/?name=TacoFace
There’s more information in this blog post, including API unification with Function Proxies. You can also use custom domains, not covered here.
OK, now that that initial part is all set up, let’s find a place to host our data.
Storing the data with CosmosDB
There are a number of ways to store the data for our function. I wanted to use Cosmos because it has one-click integration, making for a pretty low-friction choice. Get a free account here. Once you’re in the portal, we’ll go to the plus sign in the top left to create a new service and this time select “CosmosDB.” In this case, we chose the SQL version.
We have a few options for how to create our documents in the database. We’re merely making a small example for demo purposes, so we can manually create them by going to Data Explorer in the sidebar. In there, I made a database called CocktailFinder, a collection called Cocktails, and added each document. For our Partition Key, we’ll use /id.

In real practice, you’d probably either want to upload a JSON file by clicking the “Upload JSON” button or follow this article for how to create the files with the CLI.
We can add something in JSON format like this:
{
 "id": "1",
 "drink": "gin_and_tonic",
 "ingredients": [
   "2 ounces gin",
   "2 lime wedges",
   "3–4 ounces tonic water"
   ],
 "directions": "Add gin to a highball glass filled with ice. Squeeze in lime wedges to taste, then add them to glass. Add tonic water; stir to combine.",
 "glass": [
   "highball",
   "hurricane"
   ],
 "image": "https://images.unsplash.com/photo-1523905491727-d82018a34d75?ixlib=rb-0.3.5&ixid=eyJhcHBfaWQiOjEyMDd9&s=52731e6d008be93fda7f5af1145eac12&auto=format&fit=crop&w=750&q=80"
}
And here is the example with all three that we’ve created, and what Cosmos adds in:
Have the function surface the data
OK, now we’ve got some dummy data to work with, so let’s connect it to our serverless function so we can finish up our API!
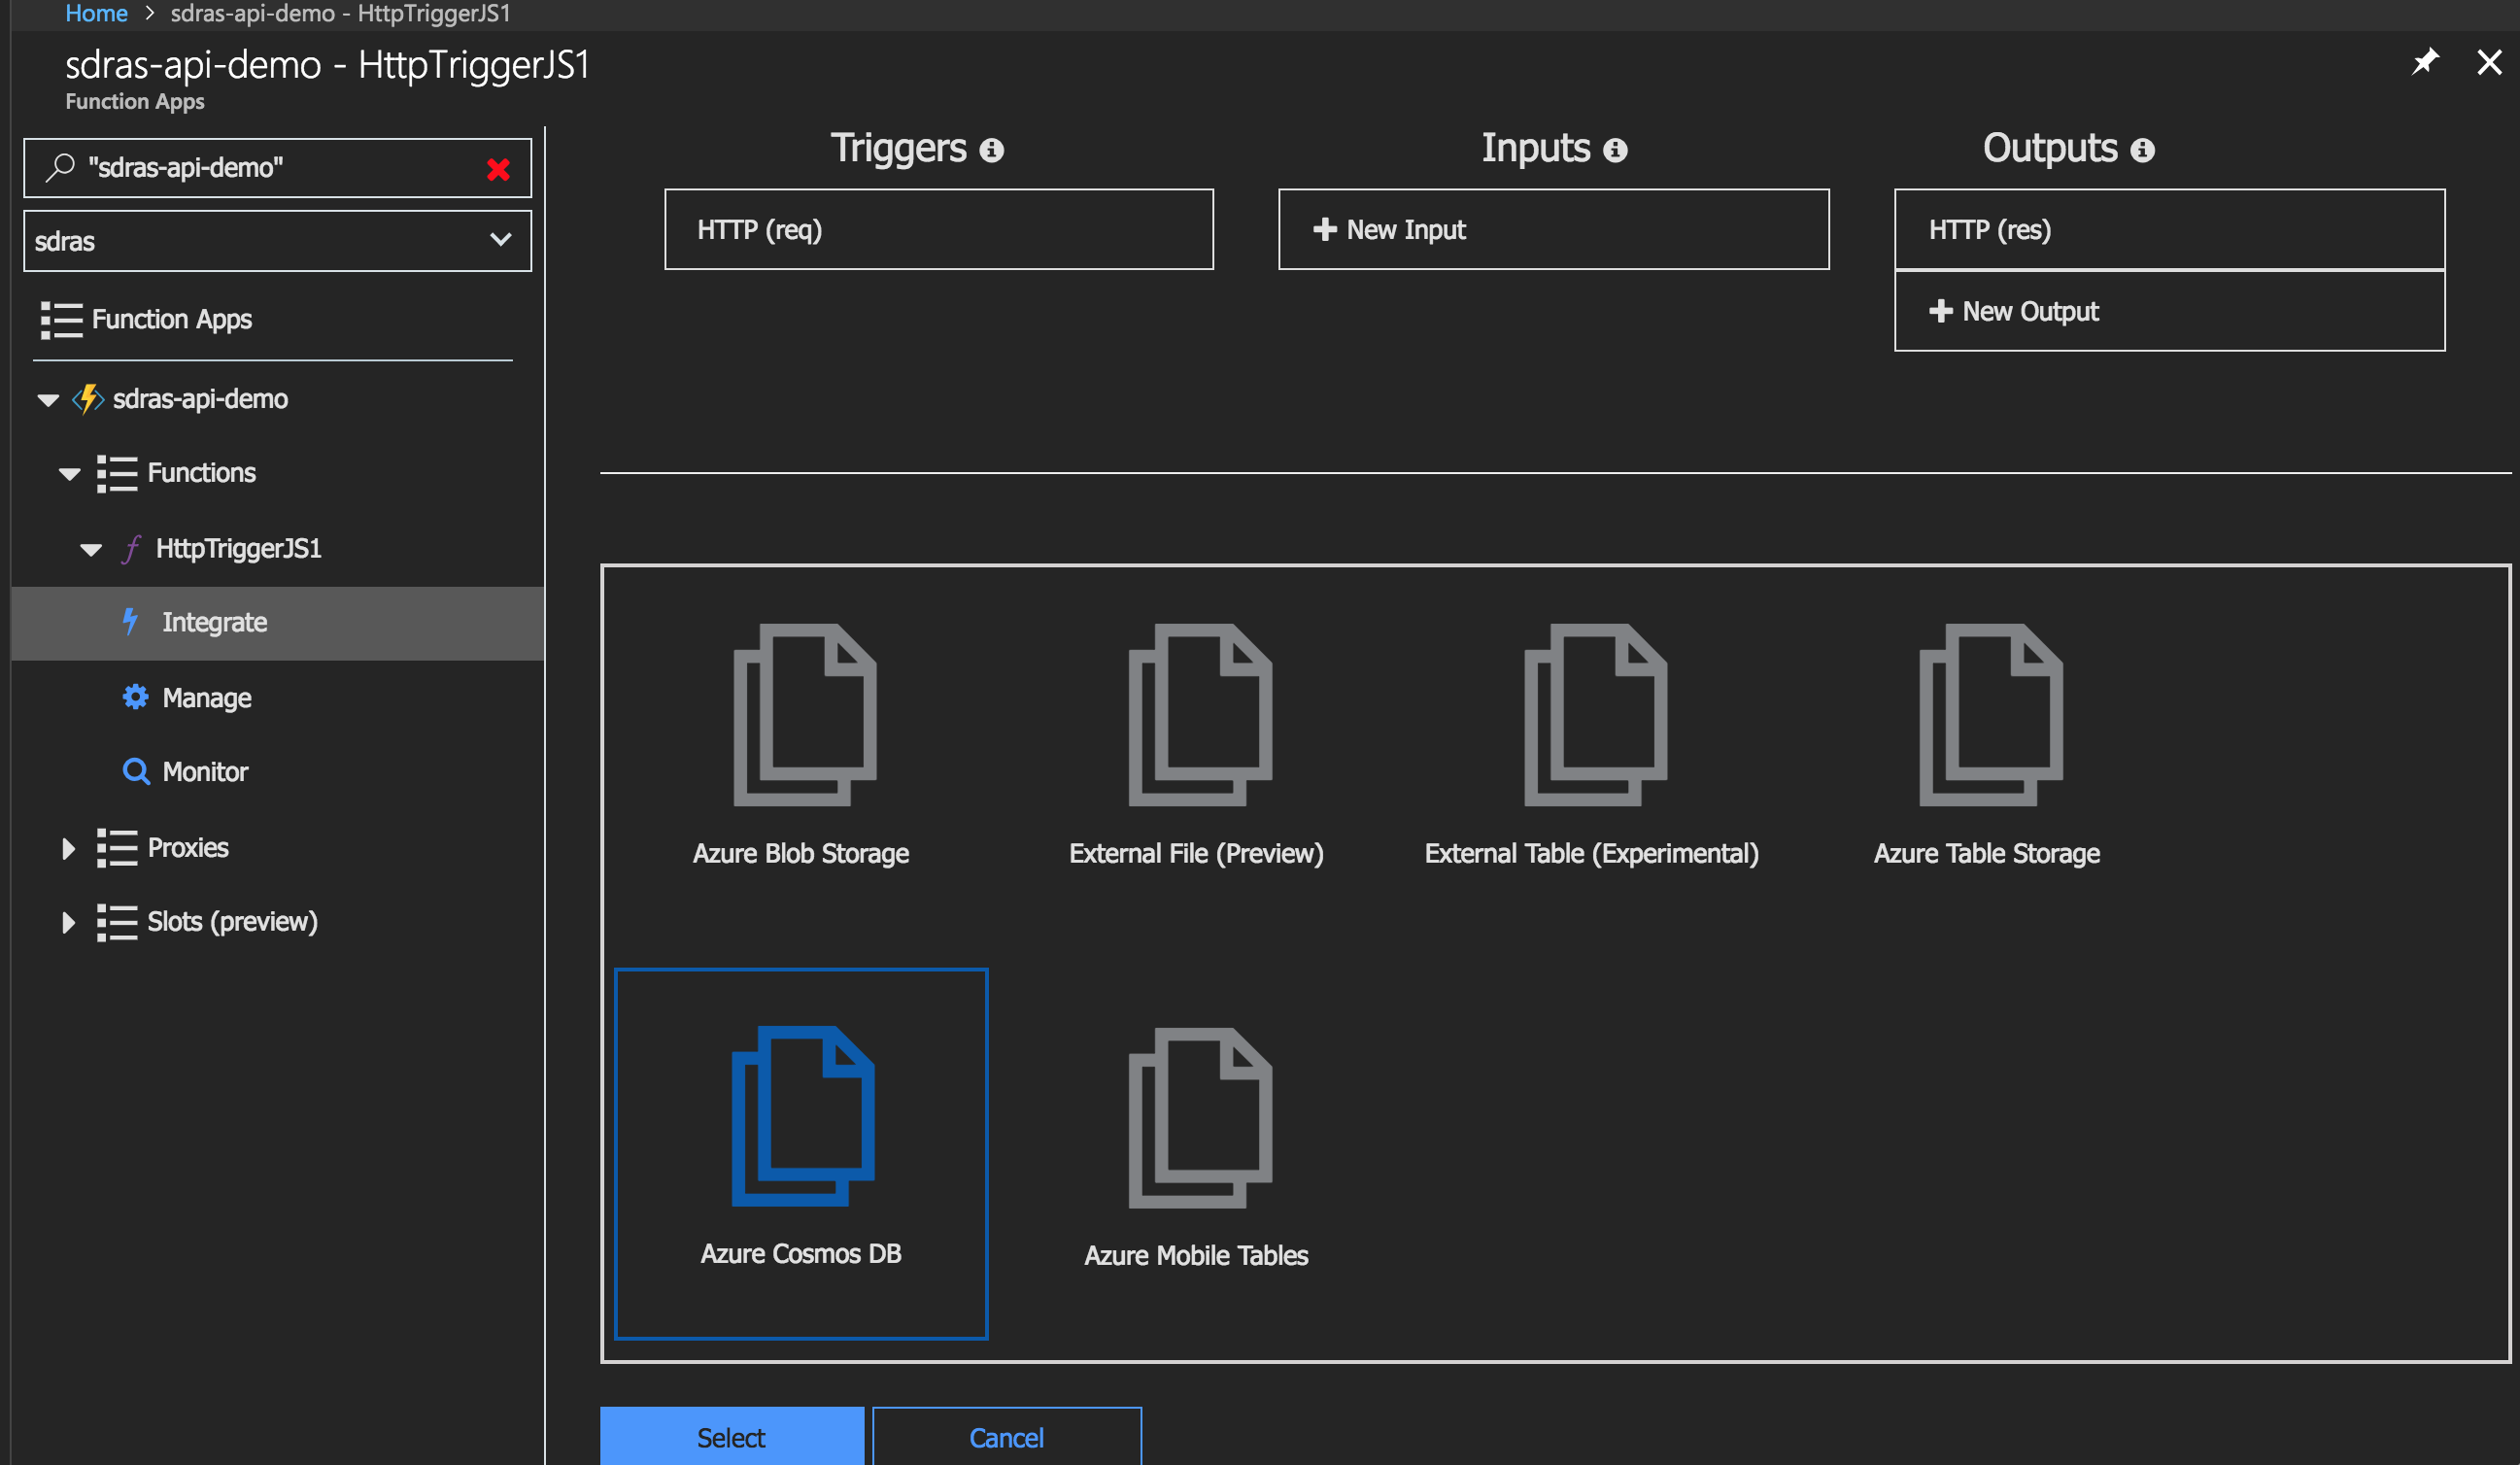
If we go back to our function in the portal and click Integrate in the sidebar again, there’s a middle column that called Inputs. Here, we can click on the plus that says “+ New Inputs” and a few options come up. We’ll click the CosmosDB option and “Create.”

A prompt will come up that asks us to provide information about our Database and Collection. If you recall, the databaseName was CocktailFinder and the collectionName was Cocktails. We also want to use the same partitionKey which was /id. We’ll use all the other defaults.
Now if we go to our function.jso, you can see that it’s now been updated with:
{
  "type": "documentDB",
  "name": "inputDocument",
  "databaseName": "CocktailFinder",
  "collectionName": "Cocktails",
  "partitionKey": "/id",
  "connection": "sdrassample_DOCUMENTDB",
  "direction": "in"
}
We’re going to use that inputDocument to update our testing function to reflect that’s what we’re trying to access. I also add in the status and log frequently, but that’s optional.
module.exports = function (context, req) {
  context.log('JavaScript HTTP trigger function processed a request.');

  if (context.bindings) {
    context.log('Get ready');
    context.res = {status: 200, body: context.bindings.inputDocument};
    context.log(context.res);
  }
  else {
    context.res = {
      status: 400,
      body: "Something went wrong"
    };
  }
  context.done();
};
Now you can see our function at work!
CORS!
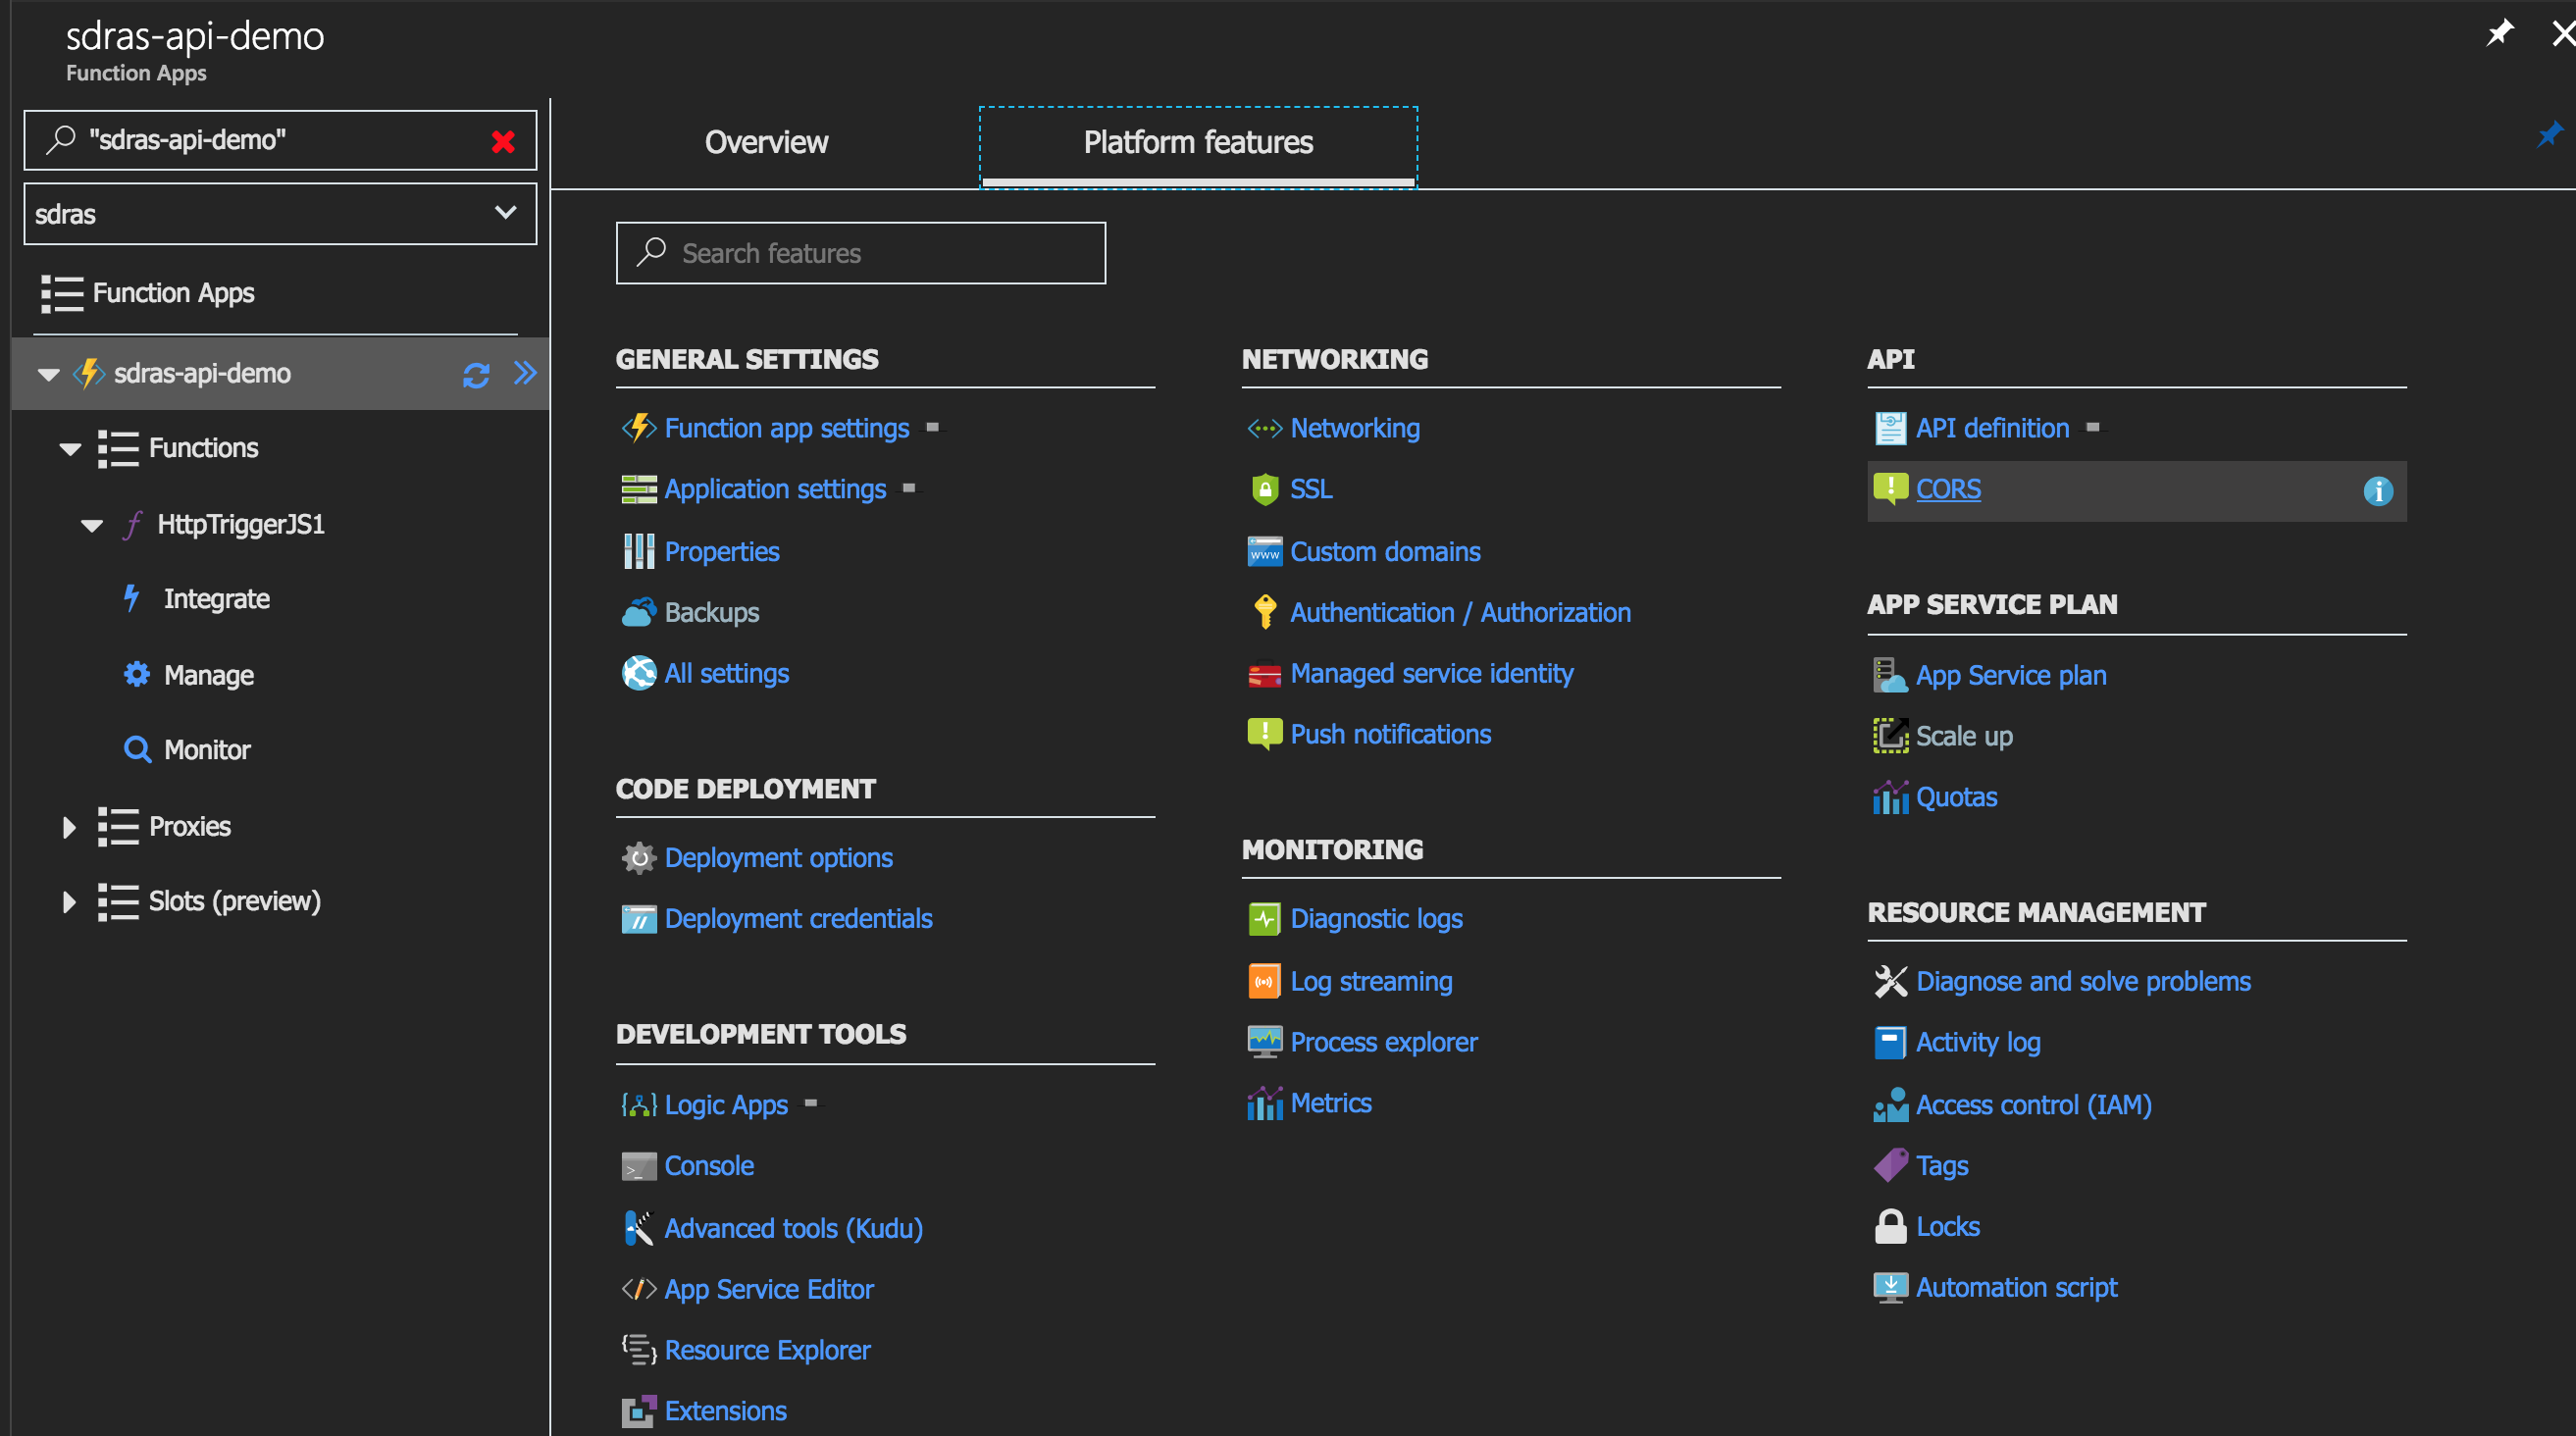
Can’t forget the CORS. Back in the portal, we’ll click on the function name and click on Platform Features. CORS is listed under the API heading.

We can add any of the allowed origins here. Remember, this includes localhost.

Serve it up!
Now to make sure the API is working and we can access it’s data from an application, we’ll use an axios call. I have a really barebones CodePen implementation so that you can see how that might work. In Vue, we’re hooking into the created lifecycle method and making the GET request, in order to output the JSON data to the page.
See the Pen Show API Output, beginning of Vue.js integration by Sarah Drasner (@sdras) on CodePen.
From here, you have all that data to play with, and you can store whatever you like in whatever form you fancy. You can use something like Vue, React, or Angular to create interfaces with the content we stored in our database, and our serverless function creates the API for us. The sky is the limit to what we can create! ?
The post Create your own Serverless API appeared first on CSS-Tricks.
Source: CSS-tricks.com