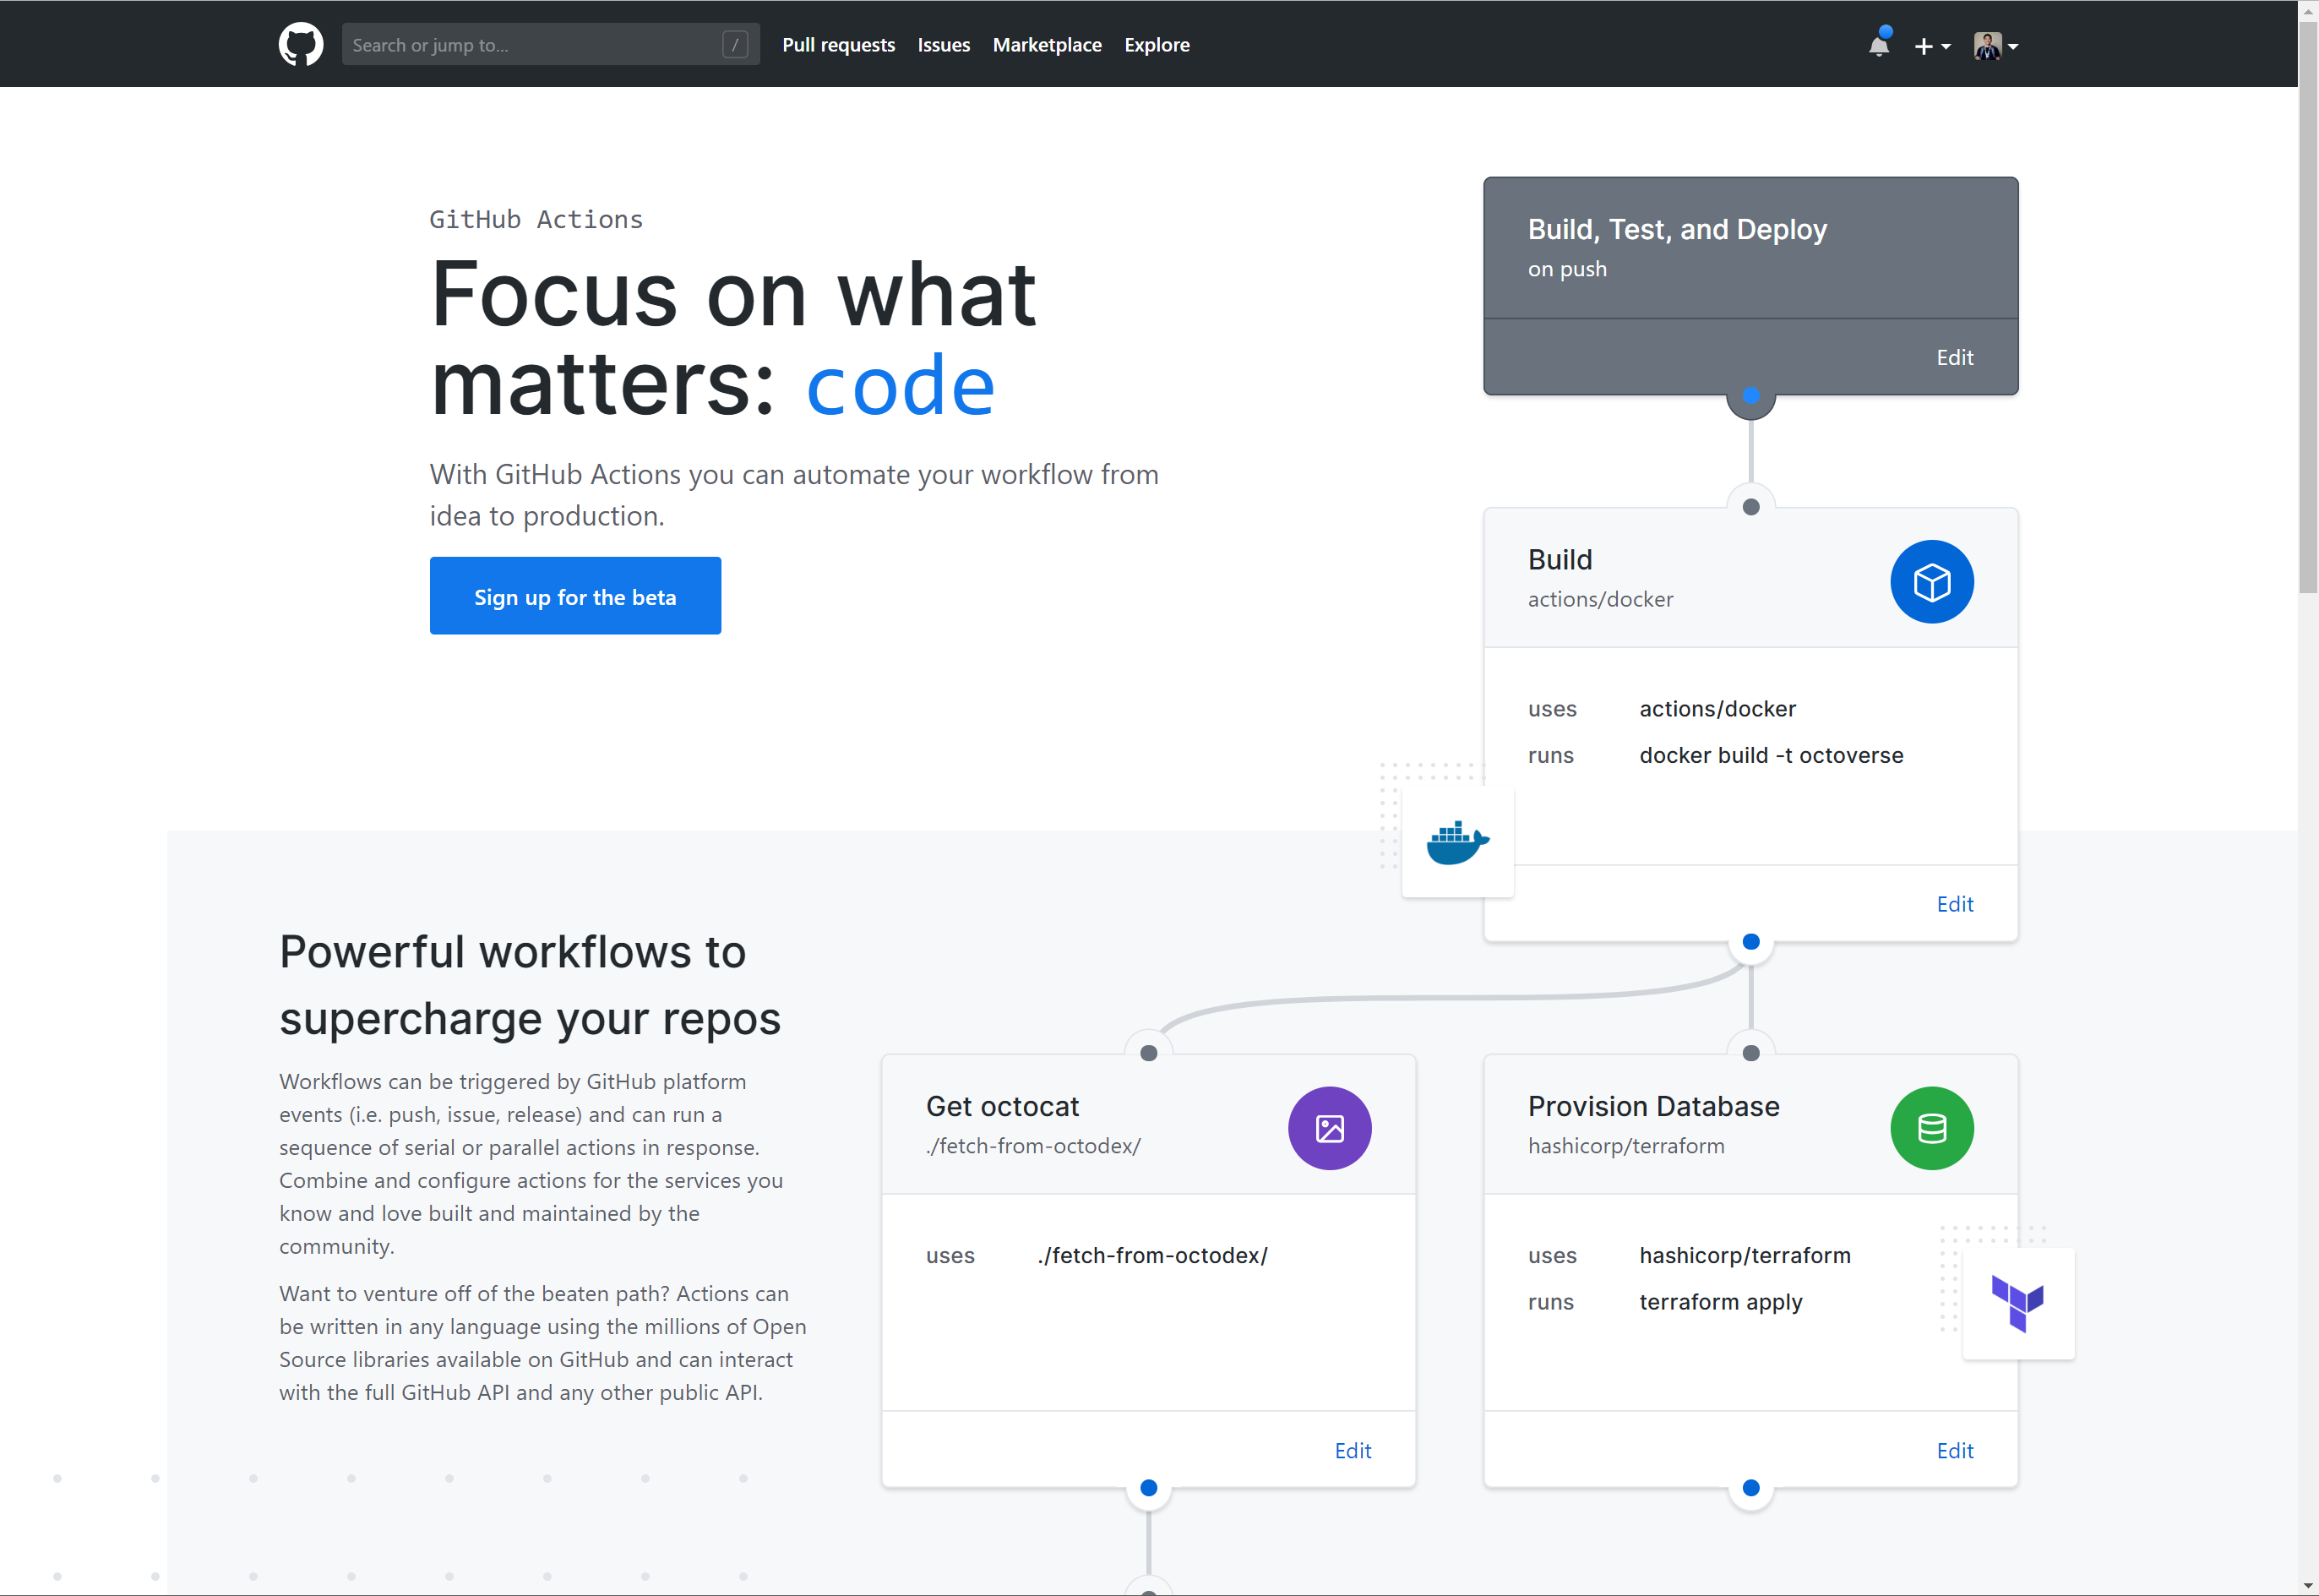
The software development process from conception of the idea to writing of code and finally deploying the finished product can be quite tedious at times. You need to handle a variety of things beyond just writing the code. But what if you could take some of this work off your shoulders? Well, this is where Github Actions come in.
A new feature recently introduced into Github, Github Actions allow you to automate your workflow by letting Github take care of a number of processes which can be triggered by a variety of events on the platform, be it pushing code, making a release or creating issues among others.
What can you do with Github Actions? The possibilities are limitless, you could do anything from:
- handling continuous integration and deployment (building, testing and deploying applications)
- publishing npm modules
- triggering alerts via mail or SMS
- much more!
This is done through actions that can be defined in your repository, any public Github repository or any published Docker image.
Note: GitHub Actions is currently in beta and you’ll need to sign up to get access.
Once you’re in, you have access to workflows and actions to start making your GitHub Actions.
You can easily access the GUI editor via an actions tab that will be added to your repos once you’ve been approved as shown here:

How it works
Github Actions work by using configured workflows which contain actions and their relationships to each other.
Workflows
These workflows define how the actions are run as well as the order of execution.
When creating a workflow, start with a main.workflow file, you will have it under the .github/ directory of your repository.
|-- my-repo (repository)
|   |** .github
|       |** main.workflow
The main.workflow file will contain any number of workflow and action blocks in an order of your choice and you will configure them in this file. Below is an example of a workflow with one workflow block and three action blocks:
workflow "MYWORK" {
  on = "EVENT"
  resolves = "ACTION3"
}

action "ACTION1" {
  uses = "docker://image1"
}

action "ACTION2" {
  needs = "ACTION1"
  uses = "docker://image2"
}

action "ACTION3" {
  needs = "ACTION2"
  uses = "docker://image3"
}
In the workflow above:
- the
onkeyword means a certain event (EVENT) triggers the workflow (MYWORK) to start MYWORKinvokes the 3rd action (ACTION3) using the keywordresolves- this action requires
ACTION2which in turn requiresACTION1
For this reason, the workflow actions are executed in the following order:
ACTION1 --> ACTION2 --> ACTION3
An action is only executed once any actions it needs have been completed successfully. If the resolves attribute is provided with an array of actions, they will be executed in parallel as would be the case below:
workflow "IDENTIFIER" {
  on = "EVENT"
  resolves = ["ACTION1", "ACTION2"]
}
Workflows with the GUI
You can also create a workflow using the GitHub provided GUI by clicking on the Actions tab and clicking on the create a new workflow button. This will open a visual editor where you can define the settings of your workflow.
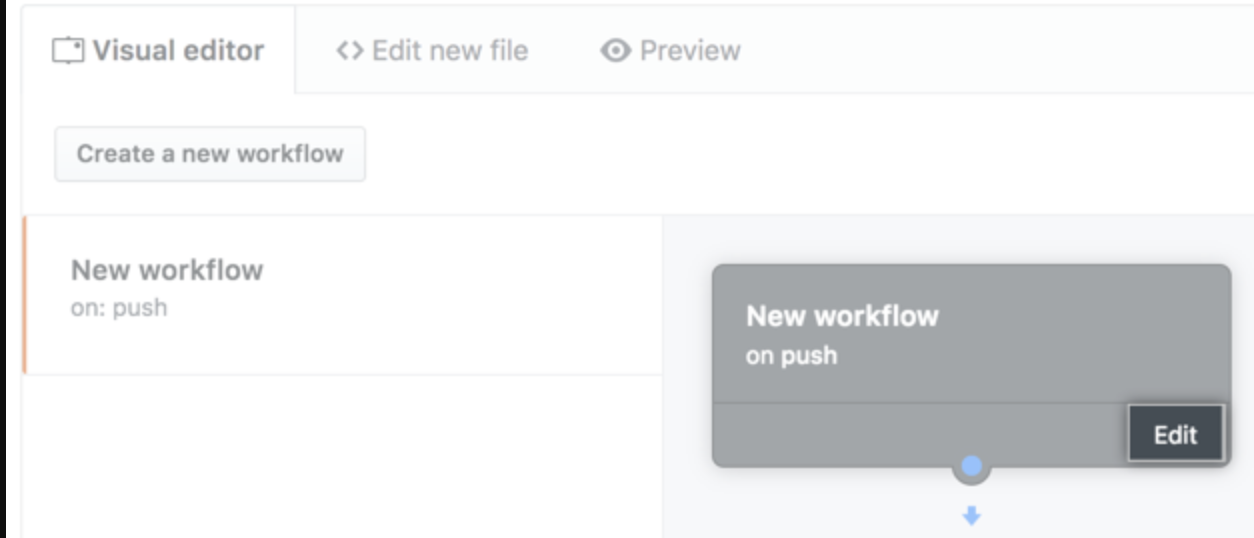
Click on edit to open up a configurations tab where you can define the name of the workflow’s name as well as the events that trigger it.
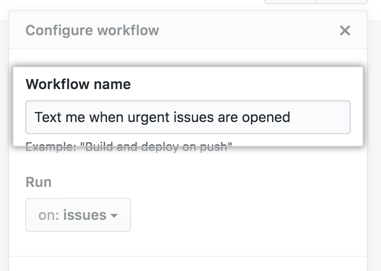
The triggers are defined on the Run drop-down.
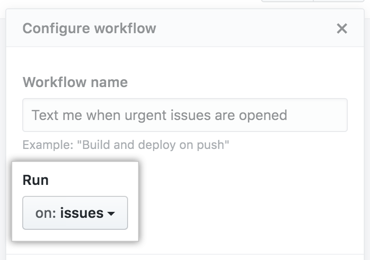
Once you’re done configuring these simply click Done and your workflow is ready to go. The next step is to add Actions to your workflow. But first, let’s look at how actions work.
Actions
The action is where we define what commands will be run. They may be stored in a docker image which can be accessed by the uses attribute. We can also tell it to run a specific command in the Docker image using the runs attribute, if this isn’t provided it will execute the Dockerfile ENTRYPOINT instruction. If we wish to have an action to execute after another, we provide a needs attribute as shown in the workflow example above.
Environment Variables
The action is also where we can provide any environment variables under the env attribute. Any secret variables such as tokens are provided under the secrets attribute, these must be set in a visual workflow editor such as the one provided by Github or in the repository’s “Settings” tab. We can also pass arguments to the actions using the args attribute, these attributes may be in form of a space-separated string or a comma-separated array.
When defining an action, it is advisable to specify the version of the action by providing a SHA or Docker tag number. This prevents your workflow from breaking in case the owner publishes an update that may affect your workflow.
Configuring Actions with the visual editor is even easier, all you have to do is drag the blue dot at the bottom of your workflow and drag it straight down to connect to the box underneath.
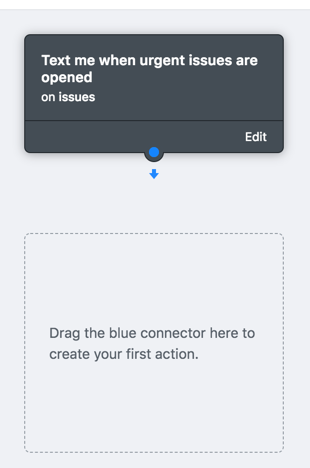
Add the name of the action under Choose Action and click Use. You can add the other configuration options as shown below and click Done once you’re finished.
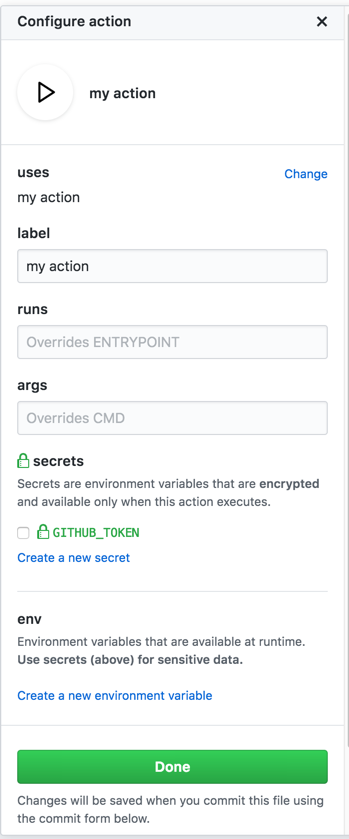
Repeat these steps if you wish to add more actions to your workflow and link them as you wish.
When you’ve finished editing your workflow, in the upper-right corner, click Start commit.

Type your commit message, choose a commit email address, and choose a commit branch, then click Propose new file .
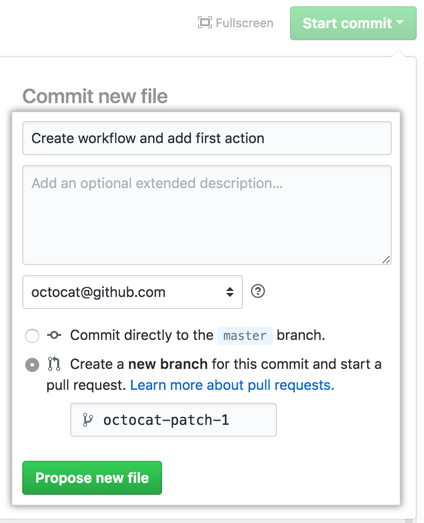
Committing a workflow enables it for your branch. To enable the workflow for the entire project, create a Pull Request to master and merge it. You will be able to see your workflows run under the Checks tab of your Pull Request before merging to ensure it runs successfully.
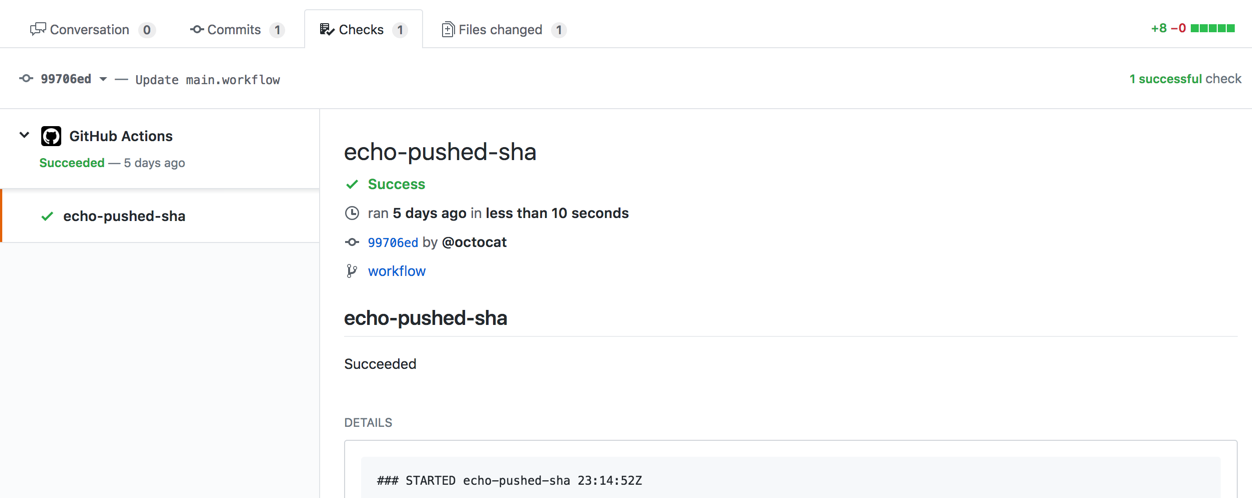
That’s it, you’re good to go with your first workflow.
To find more on how to configure your workflow, as well as which Github webhook events supported by Github Actions, check out the instructions from Github here.
Workflow Limitations
Important to note, Github has currently put the following restrictions on workflows:
- Each workflow can run for a maximum of 58 minutes including queuing and execution.
- Each workflow can run a maximum of 100 actions
- A repository can run a maximum of 2 workflows concurrently
- A task performed within an action cannot trigger other actions.
Conclusion
Github Actions is a feature that is definitely worth getting excited about. It will simplify the development workflow by handling a number of steps. It also leaves you a lot of options, if you don’t wish to go through the trouble of coding all your configurations then Github provides a GUI where you can define your workflows. This option is also extremely easy to use. However, if you wish to go in the code direction, you can configure your actions in any language as there are numerous open source libraries available on GitHub.
Github Actions is currently in Beta and you can sign up here to try it out and get familiar with it as we await the official release of this amazing new feature.
Source: Scotch.io
