Vue-Native is a framework written by GeekyAnts, it is a framework built to deliver cross platform mobile native applications. It is inspired by the React-native API, hence it gives a developer the ability to build cross platform applications in Vue.js using React Native’s robust system.
Vue Native was originally a fork from React-vue, a compiler that gave developers that ability to write Vue and React in the same codebase. In this article, we’ll build a simple application to introduce the APIs and components available in Vue native.
We’ll be building a simple application that fetches the trending Gifs on Giphy, using the Giphy API. We’ll also display the Gif and details about it using components like ScrollView, Text, Image etc.
Prerequisites
To follow this tutorial, you’ll need to have Node > 6.0 installed. You’ll also need any of the package managers, NPM (this comes packaged with Node) or Yarn.
Basic knowledge of Javascript and Vue is also required. You can follow the official Vue documentation here to get up to speed.
Getting started
Before we get started, we’ll need to setup the project and install project dependencies. We’ll be making use of Vue native CLI to bootstrap our application. There’s also an installation option using Create React Native App, this option is longer but you can find the instructions here.
First, install the Vue Native CLI by running the following command:
yarn global add vue-native-cli
//  or
 npm install -g vue-native-cli
Then initialize a new project by running the following command:
vue-native init vue-gifsRunning this command will bootstrap a Create React Native App application using the Expo CLI.
At the time of writing the Vue Native CLI needs the React Native version 0.55.4 and expo version 29.0.0, so update your package.json to set these versions. We’ll also add commands to build for ios and android platforms by updating the scripts object.
//package.json

{
  "name": "vue-gifs",
  "main": "node_modules/expo/AppEntry.js",
  "private": true,
  "scripts": {
    ...
    "build:ios": "expo build:ios",
    "build:android": "expo build:android",
  },
  "dependencies": {
    "expo": "^29.0.0",
    ...
    "react-native": "0.55.4",
    ...
  },
  "devDependencies": {
    "babel-preset-expo": "^4.0.0",
    ...
  }
}
Then update the sdkVersion in the app.json file to match the expo version. Open the app.json file and update it like the snippet below:
{
  "expo": {
    "name": "vue-gifs",
    "description": "This project is really great.",
    ...
    "sdkVersion": "29.0.0",
    ...
  }
}
Everything else will remain the same. After making these changes, run npm install or yarn to install the required versions for the application. When this is done, run npm start to run the application.
To build and run our application, we’ll be using Expo. Expo is an open source toolchain built around React-native for building Android and iOS applications. It provides access to the system’s functionality like the Camera, Storage etc.
Testing on mobile
To test the application on mobile, the expo-cli provides various methods to test the application. The first is using a URL generated after running the application, this URL can be visited on your mobile browser to test the application.
Run the npm run start-native command within your project folder to run the application using expo. expo typically starts your application on port 19002, visit http://localhost:19002 to view the expo dev tools. Within the dev tools you can send the preview link as an SMS or email to your mobile phone.
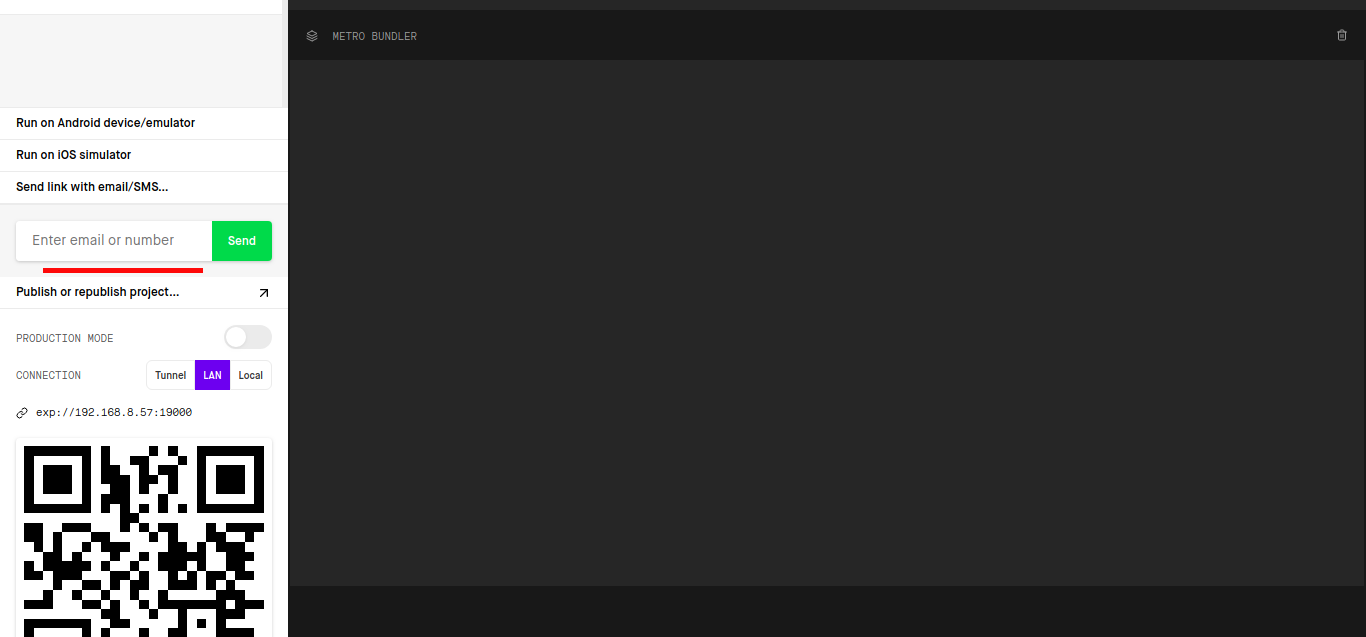
You can select any of the three connection options. An external tunnel, LAN or Local connection. For the local connection, your mobile phone and work PC have to be connection to the same network but the tunnel works regardless.
The next method which is the easiest is downloading the Expo mobile app, it can be found on both the Apple App store and the Android Play store. On iOS, after installing the app, open up your camera and scan the barcode above to run your application. While on Android, you can use the Expo app to scan the barcode and run the application.
Run any of the following command to test on either platforms:
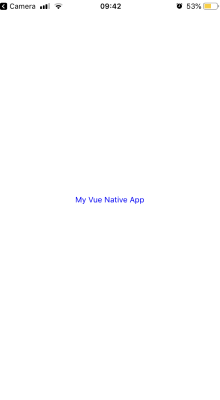
npm startAfter starting the application, scan the barcode and view the application on the expo app. You should see a view similar to the screenshot below:
Let’s see the other methods we can test the application on mobile. The next option for testing on a mobile device is using an emulator or simulator. Using Android studio or Xcode, you can boot emulators or simulators for their respective platforms. Download and install the tool for the platform of choice, Xcode for iOS and Android studio for Android. After installation, run any of the following commands to start the application:
npm run ios
  # OR
npm run android
Creating a Giphy application
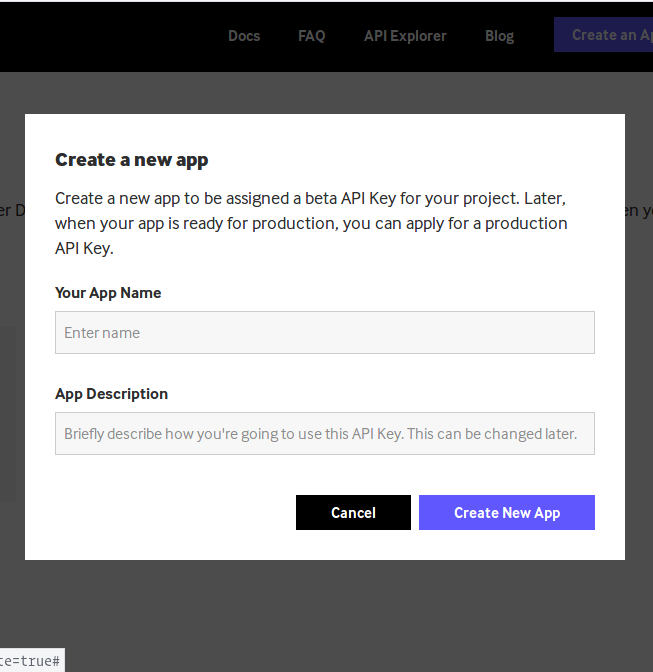
To get started consuming the Giphy API, you’ll need to log in to your Giphy account, create one if you haven’t already. The next step is to create an app on the developer platform. On your developer account dashboard, there’s a Create App button, click it and fill in the details about your application.
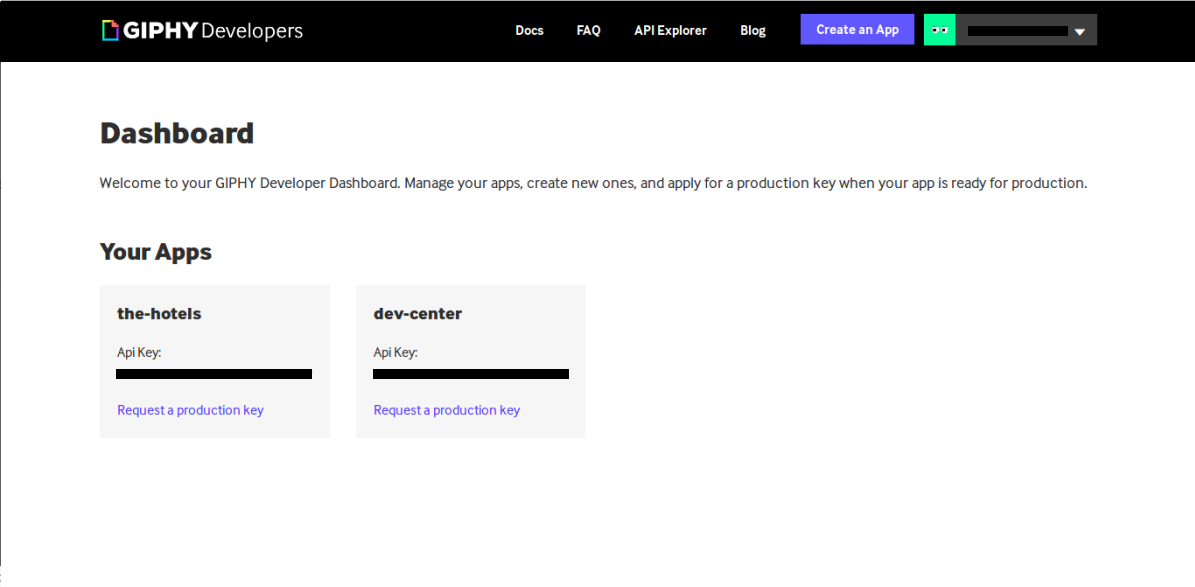
After creating the app, your new application should be displayed on your dashboard with an API key, this key will be used when making requests to Giphy
To make requests to the Giphy service, we’ll make use of their Javascript SDK. Run the following command to install the package:
npm install --save giphy-js-sdk-coreNow we can go ahead and consume the APIs with the help of this SDK.
App component
Our application is a simple one that displays the trending gifs on the Giphy platform. Using the Giphy API, we’ll get the associated gif image, title and type from the returned data. The data will be displayed using some of the components provided by vue-native. Open the App.vue file in the root folder and update it like the snippet below:
<template>
    <view>
        <scroll-view class="scroll-view">
           //Todo: Create gif item and header
           <view class="loading-container" :style="{flex: 1, justifyContent: 'center'}" v-if="loading">
              <activity-indicator size="large" color="#0000ff"></activity-indicator>
            </view>         </scroll-view>
    </view>
</template>
<script>
  import Giphy from 'giphy-js-sdk-core';
  const client = Giphy('GIPHY_API_KEY');

  export default {
    name: 'App',
    data() {
      return {
        gifs: [],
        loading: true,
      };
    },
    async created() {
      const response = await client.trending('gifs', {limit: 20});
      this.gifs = response.data;
    },
  };
</script>
<style>
    .scroll-view {
        padding-top: 20px;
        padding-bottom: 30px;
    }
    .loading-container {
        height: 600px;
    }
</style>
In the snippet above, the App component renders a scrollview component that houses the components elements. It only displays an activityindicator, this will be replaced by the list of gif when the call to the API is complete.
Also, we instantiate the Giphy client using the API key obtained from the developers dashboard and replace the placeholder string with the API key. Calling the trending method makes a call to the Giphy trending endpoint. The first provided parameter is gifs, this indicates which trending items should be returned, gifs or stickers. The second parameter is an object providing optional parameters like the limit, offset, rating and fmt (format).
We’ll just be providing a limit parameter, limiting the results to 20 items. This call is made in the created lifecycle of the component. Next, we’ll create the gif item to render the returned results.
After reloading, the application should display the activity indicator:

Creating the gif item component
Each gif item will be displayed using a View component, the View component is an important building block, it supports layout using flexbox, styling and accessibility. Each item will display the gif, title and type. Create a folder components in the root folder. Within the components directory, create a named GifItem.vue and update it with the code below:
// GifItem.vue

<template>
  <view class="container">
    <image class="img" :source="{uri: `${gif.images.original.url}`}" style="max-width:100%;"/>
    <text class="title">{{titleCase(gif.title)}}</text>
  </view>
</template>
<script>
export default {
  name: "GifItem",
  props: ["gif"],
  methods: {
    titleCase(text) {
      const textArray = text.split(" ");
      return textArray
        .map(text => {
          const trimmedText = text.trim();
          return `${trimmedText[0].toUpperCase()}${trimmedText.slice(1)}`;
        })
        .join(" ");
    }
  }
};
</script>
<style>
.container {
  display: flex;
  flex-direction: column;
  align-items: center;
  margin-bottom: 30px;
  position: relative;
}
.img {
  height: 200px;
  width: 300px;
}
.title {
  font-size: 14px;
  font-weight: 500;
  margin-top: 7px;
}
</style>
Using the Image component, we can display the source of each gif and the Text component to display the gif title. The Image component takes a source prop which is an object with a uri property.
The titleCase method takes the title of each gif and returns the text in title case, capitalizing the first letter of each word in the text. The GifItem component will take a single prop gif.
Let’s update the App.vue file to include the new GifItem. Update the file with the snippet below:
<template>
    <view>
        <scroll-view class="scroll-view">
            <gif-item v-for="gif in gifs" :gif="gif" :key="gif.id" v-if="!loading"/>
            <view class="loading-container" :style="{flex: 1, justifyContent: 'center'}" v-if="loading">
                <activity-indicator size="large" color="#0000ff"></activity-indicator>
            </view>
        </scroll-view>
    </view>
</template>
<script>
  import Giphy from 'giphy-js-sdk-core';
  const client = Giphy('API_KEY');
  import GifItem from './components/GifItem';

  export default {
    name: 'App',
    data() {
      return {
        gifs: [],
        loading: true
      };
    },
    async created() {
      const response = await client.trending('gifs', {limit: 20});
      this.gifs = response.data;
      this.loading = false;
    },
    components: {GifItem}
  };
</script>
<style>
    .scroll-view {
        padding-top: 20px;
        padding-bottom: 30px;
    }
    .loading-container {
        height: 600px;
    }
</style>
When you open the application in the expo app, you’ll see something similar to the screenshot below:

If you can’t see gifs listed, go through the tutorial again to see what you’ve have missed along the way.
Header component
After successfully querying for trending gifs and displaying them using native components, let’s include a header to give the application context. Using the View component, we’ll create an area that will act as the header for our application. Create file called header.vue within the components directory and update it with the code below:
// /components/header.vue
<template>
    <view class="header-container">
        <text class="header">Trending</text>
    </view>
</template>
<script>
  export default {
    name: 'header.vue'
  };
</script>
<style scoped>
    .header-container {
        background-color: rgba(0, 0, 0, 0.05);
        display: flex;
        justify-content: center;
        padding-top: 15px;
        padding-bottom: 15px;
        border-bottom-color: aquamarine;
        border-bottom-width: 1px;
        margin-top: 20px;
    }
    .header {
        font-size: 16px;
        color: black;
        opacity: 0.8;
        font-weight: 600;
        text-align: center;
    }
</style>
Now let’s add the header component to the App component. This will display a simple header at the top of the application. Update the `App.vue` file to include the Header component:
<template>
    <view>
        <header/>
        <scroll-view class="scroll-view">
            ...
        </scroll-view>
    </view>
</template>
<script>
  import Giphy from 'giphy-js-sdk-core';
  const client = Giphy('TxuQbNU1nyDBwpqrcib61LxmOzsXTPEk');

  import GifItem from './components/GifItem';
  import Header from './components/header';

  export default {
    name: 'App',
    data() {
     ...
    },
    async created() {
      ...
    },
    components: {GifItem, Header}
  };
</script>
<style>
   ...
</style>
After the application refreshes the header will be added to the top of the application.

We’ve been able to achieve a lot of display functionality using the components provided by Vue-native.
Deploying the application
We’ll be deploying our application to the Android Play store. To achieve this, we’ll need to update the app.json to include Android specific properties. Open the app.json file and update the file to include the `android` field:
{
  "expo": {
    ...
    "android": {
      "package": "com.vue.gifs"
    }
  }
}
The android.package field is a unique value that will represent your package in the app store. You can read more on the package naming convention here. After updating the file, run the npm run build:android command.
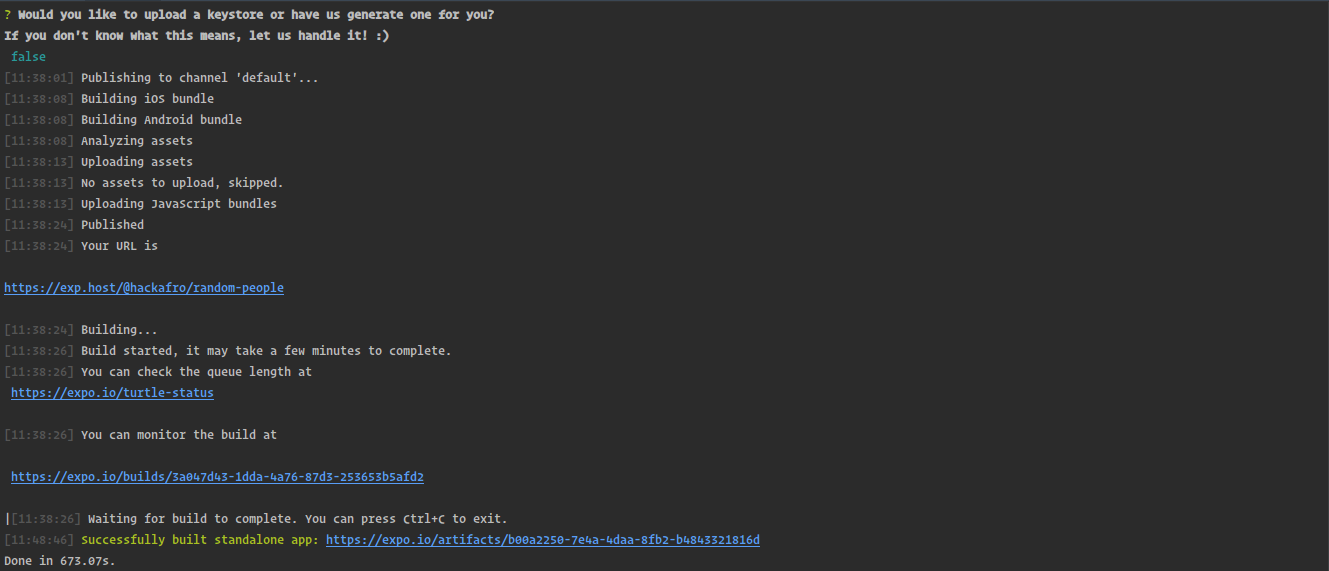
This command will present you with a prompt, asking you to provide a keystore or to generate a new one. If you have an existing keystore, you can select this option or let expo generate one for your application.

After completion, a download link will be generated for your application, clicking on this link will be trigger a download for your apk.
To deploy the downloaded APK to the Android Play Store, visit the Play Console to create an account, then you’ll be required to pay a registration fee of $25 before proceeding. When registration is complete, visit this page and follow the steps to upload your application to the Play Store.
Summary
Vue native has provided a solution to build for mobile platforms using Vuejs. It compiles to React and uses components provided by React Native. As as the time of writing, some of it’s components require that you write JSX with the actual React Native components. Since Vue native works with React native, you can follow the official React native documentation.
Vue native is still in it’s infant stages and has a lot of potential, it creates an opportunity for Vue.js developers to build cross platform mobile applications. You can view the source code for the demo here.
Source: Scotch.io